 Loading... Please wait...
Currency Displayed in
Currency Converter
Select Videos List
- • What Videos Should I Get? A Buyer's Guide
- • Shop Our Latest Video Releases
- • Shop All Single Instructional Digital Downloads
- • Shop All Digital Download Sets
- • Shop All Single Instructional DVDs
- • Shop All Discounted DVD Sets
- • Shop Soaring Basics Programs - Digital & DVD
- • Shop Thermal Soaring Training - Digital & DVD
- • Shop Electric Glider/F5J - Digital & DVD
- • Shop All DLG & F3K Training - Digital & DVD
- • Shop Glider Building - Digital & DVD
- • Shop Documentary Film Downloads
- • Shop Entertainment Film DVDs
Dust Buster Turbo Boost Lipo Battery Hack
Posted by Paul Naton on 23rd May 2017
Use The Coupon Code rca10off to get 10% Off Your Video Order Total !
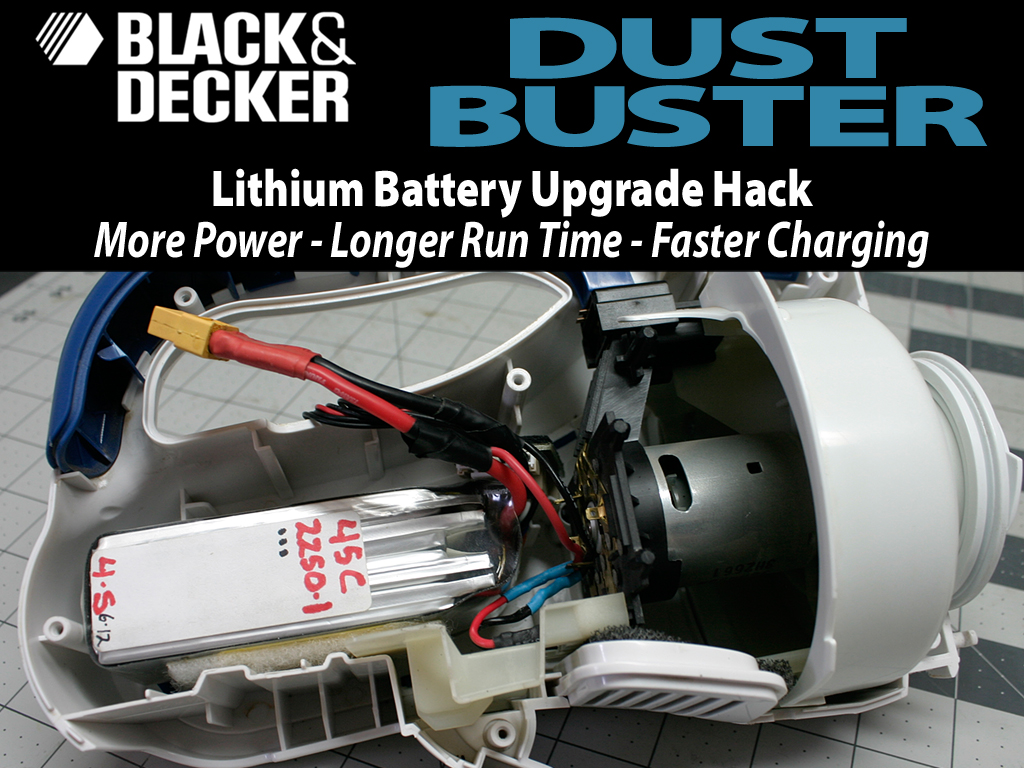
Black & Decker Dust Buster Lithium Battery Upgrade Hack
I had a classic Black & Decker Dust Buster vacuum in my shop for years as they are great for cleaning up table top debris and sanding dust while working on r/c gliders.
The units performance was never that great and the runtime short even after a full charge. Recently, the Buster's RPMs would start to fall rapidly after a few seconds of use and I suspected a failing battery pack. I hate to throw out perfectly good used cordless machines and it's always the batteries that fail long before the mechanics do.
The Buster says 14.4 volts on the side so I knew there was a huge and heavy NiCd or NiMh pack sitting in that fat rear fuselage. At 14.4 volts, that would qualify it for some sort of Lithium pack, LiPo or some of those cool new Lion 3.7v cells. I had already replaced the dead NiCd 5S packs in my shops' Makita cordless drills with 2S 18650 Lion cells, and they now are always ready to go and run forever.
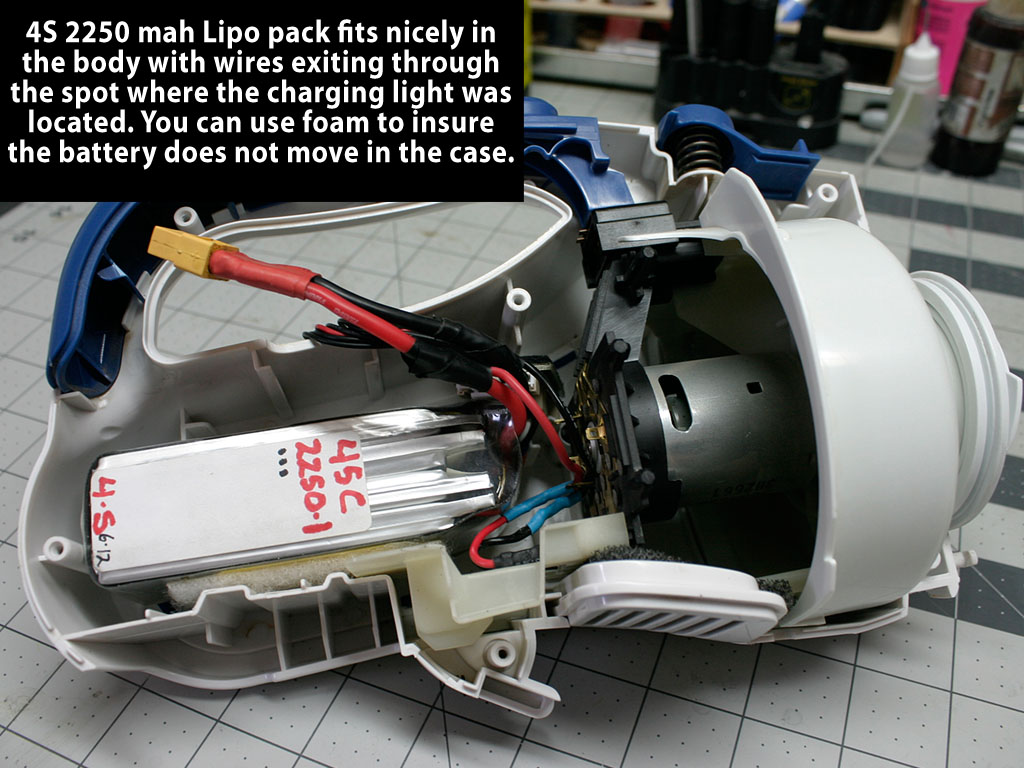
I poured myself a cold Porter and started to disassemble the unit to check out that old failing battery pack. The included photos show the internals and the wiring changes I made, it's an easy mod as long as you don't short the new pack while modding the wires.
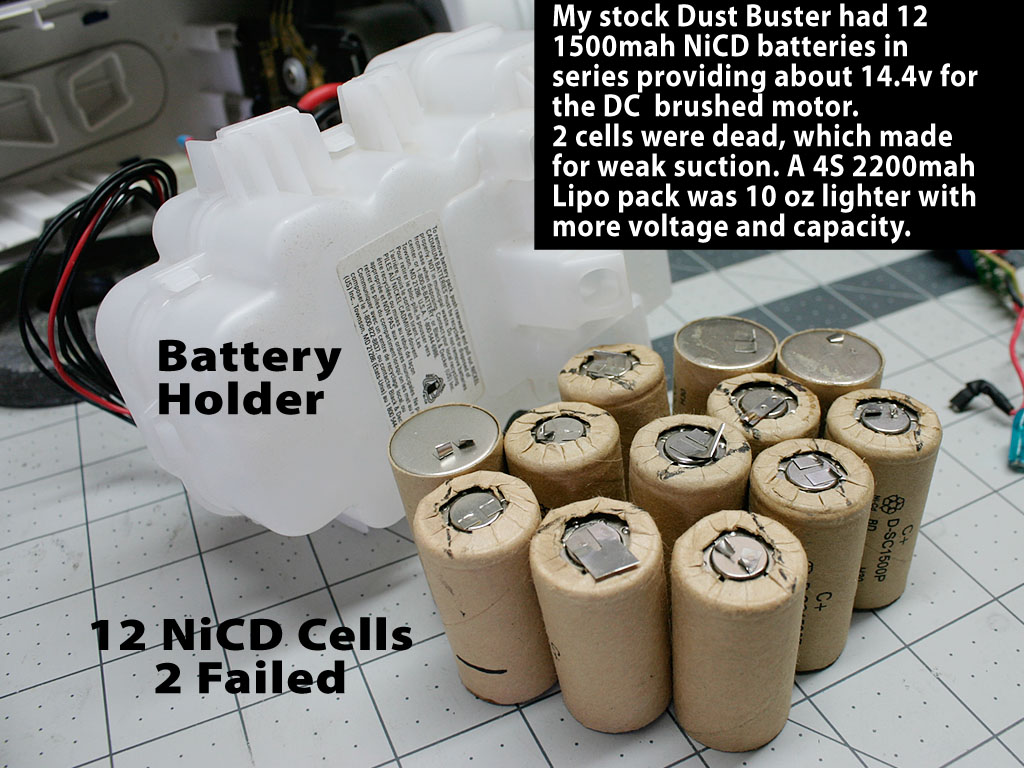
The Buster comes apart easily, (warranty voided!) and I found a huge plastic battery box inside with a 12S 1500mah NiCD pack inside. I knew that some of the cells might be bad, so I trickle charged it for 8 hours, and then tested the voltage of each cell. I was looking for any single cell reading at or under 1.1v. Two cells were at 1v, and another was at 1.1v. The rest of the cells measured at around 1.2v, though I suspected some memory effects over time had also reduced the packs capacity. The missing voltage of 3 cells really killed the units suction. Total weight of the NiCd pack was 19 oz.- 538 grams!
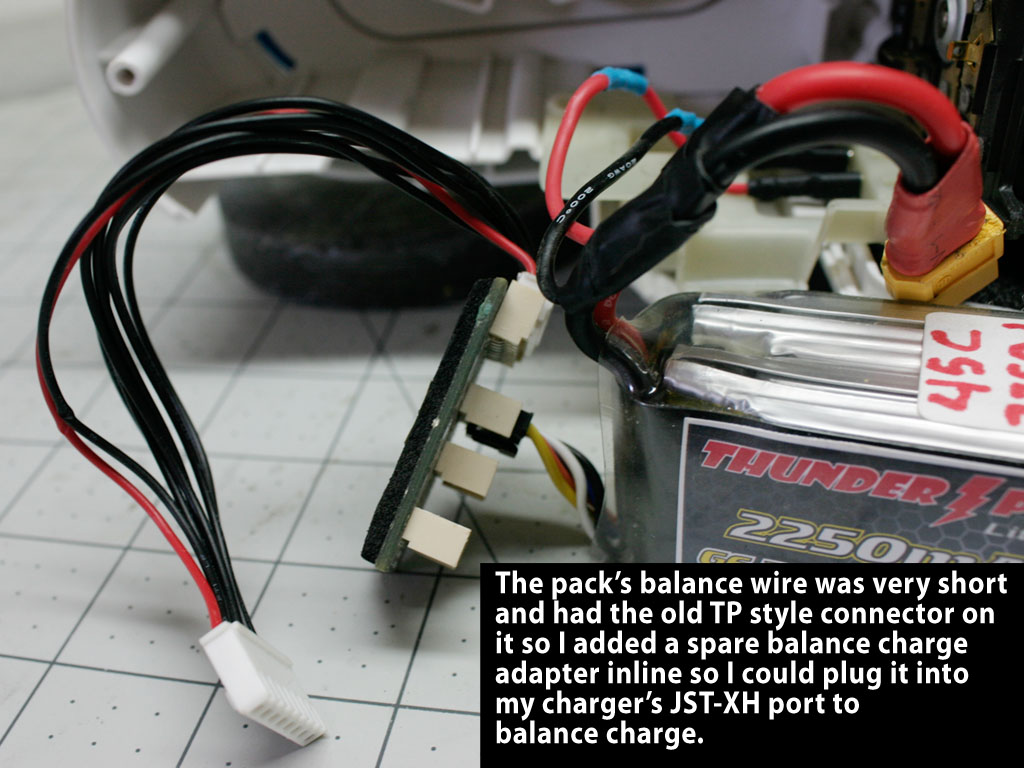
For a replacement battery I picked out of my LiPo safe a used 40C rated Thunder Power 4S 2200 Lipo which was no longer flight worthy, but still good enough for a low amp draw application. You could use a 4S Li-on or Li-Fe pack for this application/hack as well. This battery had the old TP style balance connector with very short wires, so it was easier to plug the balance connector into a spare TP to JST-XH adapter board instead of soldering a more modern JST port on it. Balance charging is required to keep the cells healthy in this application. The XTC 60 connector hooks right to any of my chargers and I can charge the pack in minutes instead of hours. Nice. Total battery weight was now just 10 oz. - 283 grams!
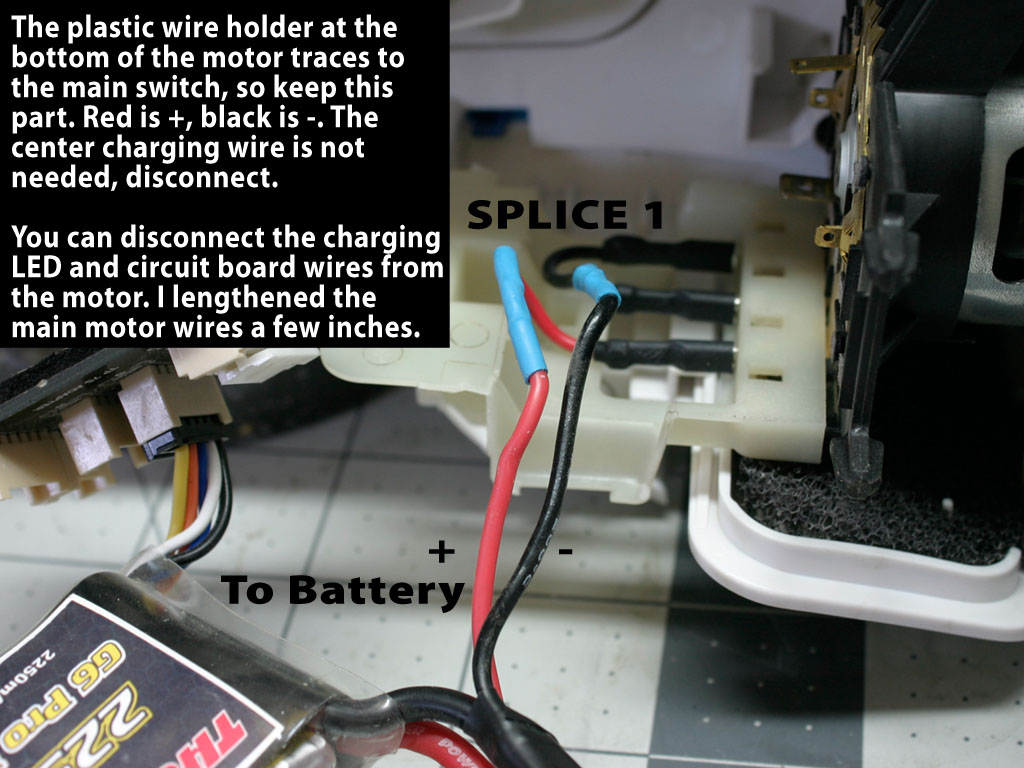
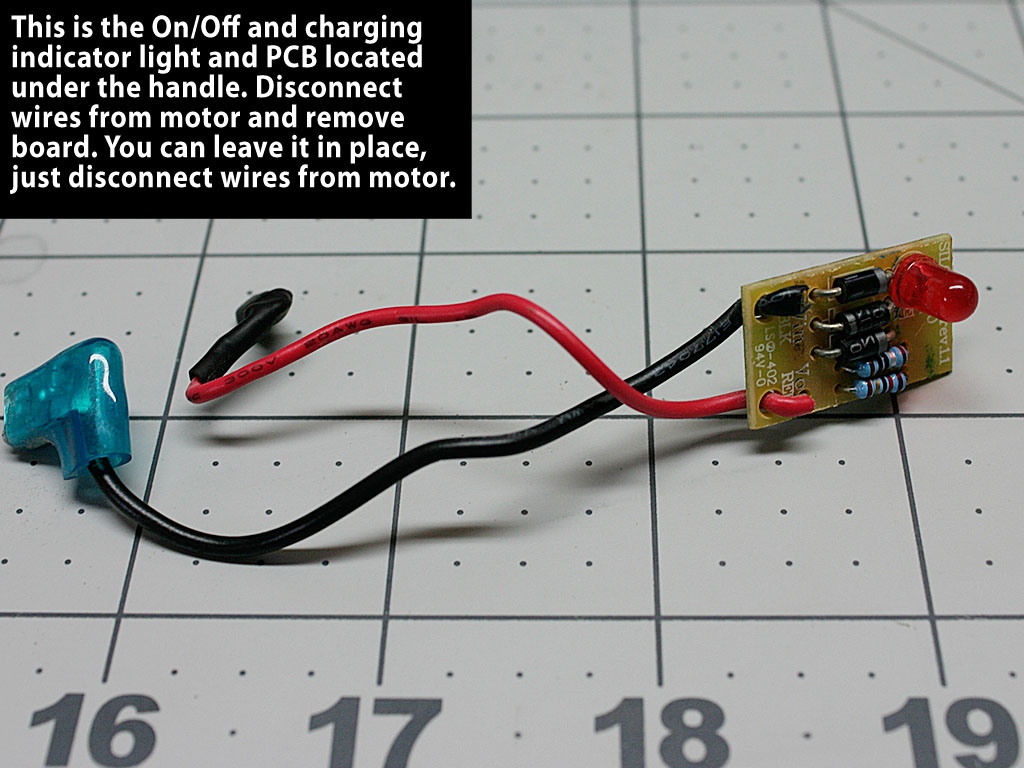
The internal wiring is easy to figure out, there is a DC brushed motor connected to a plastic holder that has traces to the main power switch and the charging circuit PCB. I cut the battery box out, and removed the charging and power LED indicator light and PCB board from the the top of the main body. The PCB board has 2 wires to the motor, just disconnect them. You can keep the PCB board in place as long as you disconnect the wires to the motor, but I wanted to run the charging wires through this hole so I discarded this part.
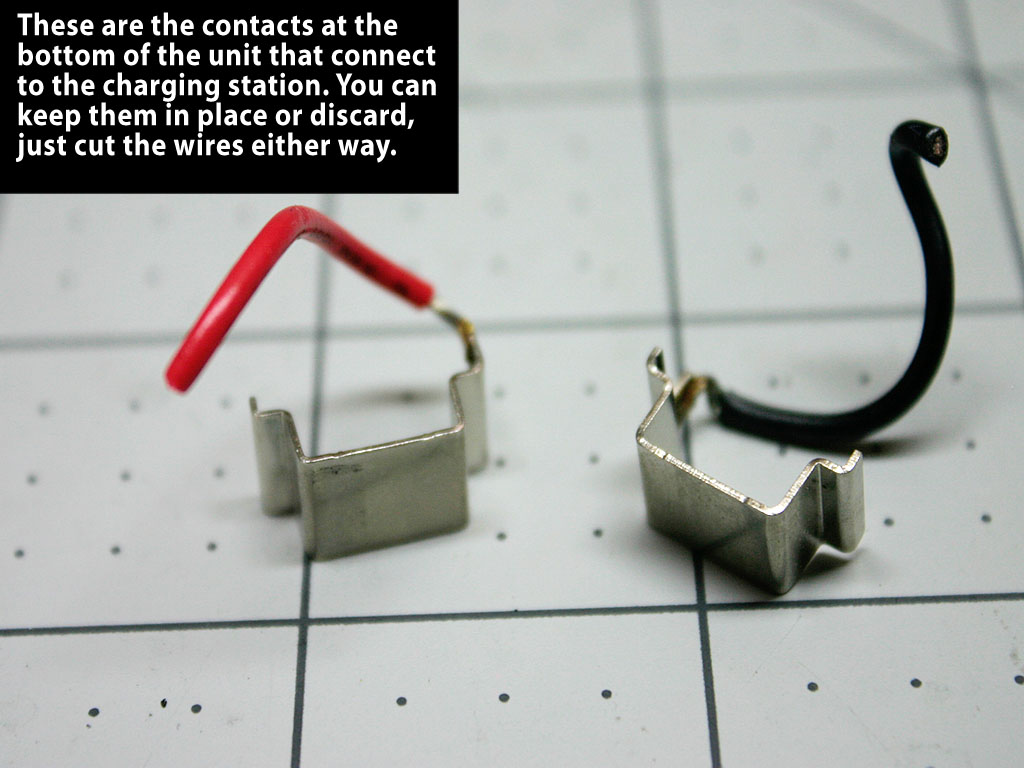
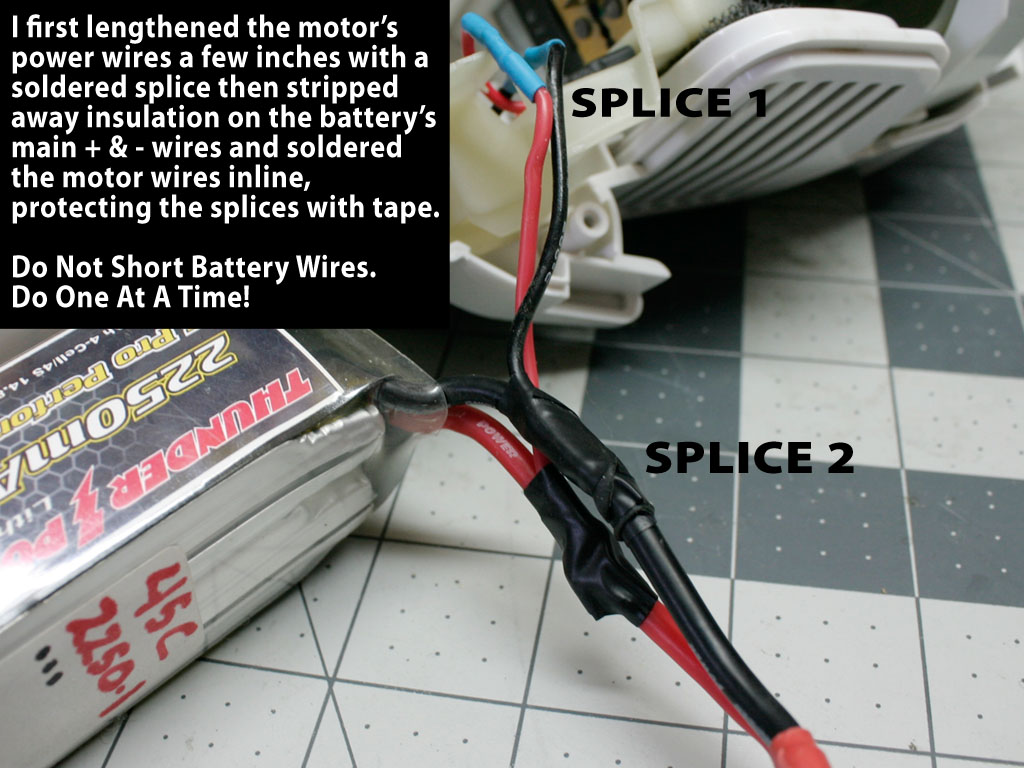
I next lengthened the two main motor power wires from the plastic holder a few inches with a solder splice which gave me some working slack. The center wire on the plastic wire holder can be cut or disconnected. You can also disconnect and remove the metal charging contact tabs at the bottom of the unit.
The + and - wires need to be spliced into the main battery wire for motor power. Do each wire separately for safety, do not short the battery wires! I cut a small amount of the wire insulation from the negative battery wire first, then soldered the - motor wire to the - battery wire. Some tape insulated the splice. I then did the same for the + wires. With the motor wired to the battery, you can then test the switch, which should be in the OFF position when soldering power wires. The motor should turn on.
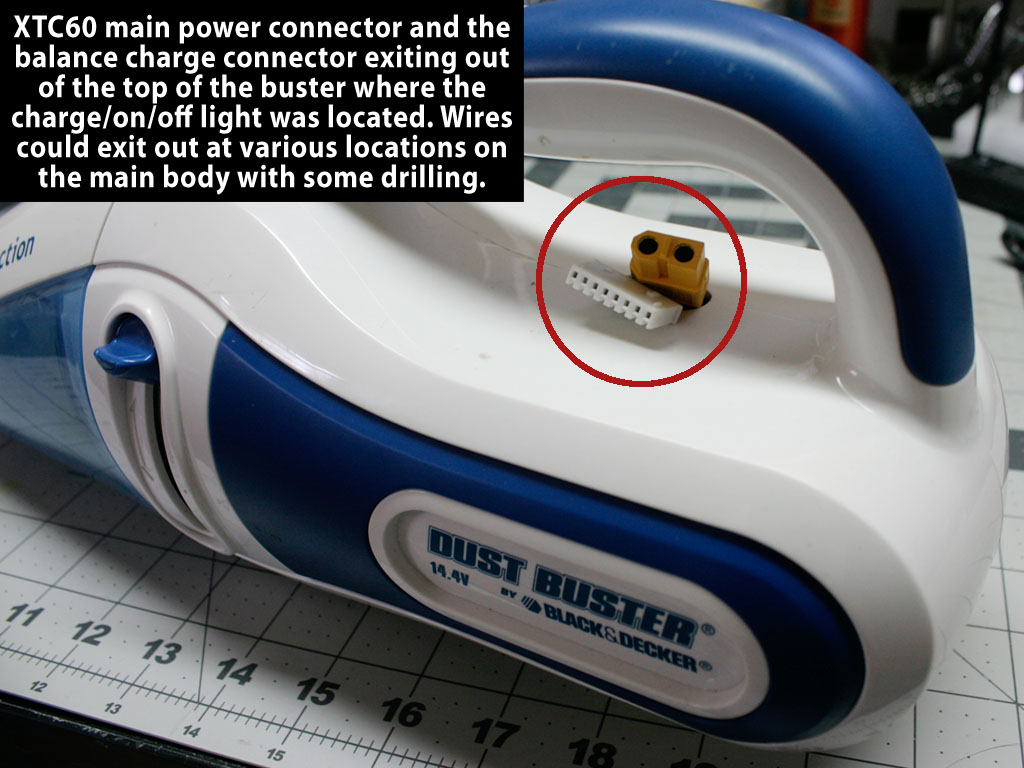
You will need to run the main battery power wires and the charge balance connectors outside the unit for charging. I was lazy and used the hole from the LED light and PCB under the handle to exit the wires. You can cut or drill a hole just about anywhere in the vac's body to exit the wires.
The freshly charged 4S Lipo outputs a solid 16+ volts to the motor, about 1.5 volts higher than the best the NiCds could give. The suction is noticeably better at the higher RPM's and there is no voltage sag or motor over-heating even after many minutes of run time. Once the RPMs start to noticeably drop, its time to recharge, you don't want to drain any Lithium pack to zero. You can use your Lipo voltage meter to check remaining capacity just like with your powered r/c planes.
Dust Buster models vary, but most older models are likely to have NiCD packs and should be easy to modify with new batteries. Newer DB models are available with Lithium batteries so just buy one of those for your shop. This was an easy hack and this useful tool will be running for many years to come and I won't feel guilty feeding it carbon dust until it dies a natural death. **Use any lithium battery with caution and charge them properly. NiCd batteries should be recycled at an authorized location. - Paul Naton www.radiocarbonart.com
Recent Posts
- » DVD Sales Ending 12-30-2023
- » WATCH FREE: Vixen 2 F5J Glider Build, Set Up, And Flying Video Series
- » Watch FREE R/C Soaring Documentaries Best of Scale Soaring & Just Want To Fly
- » New Radian Tune-Up & Servo Fix/Relocation How-To Video
- » Black Friday Deals Nov 23 to 26th: 20% Off ALL Downloads & DVDs


